Browsing Category

DIY

DIY Living

Homework Space Progress

My goal was to have the room completed by the start of school. I didn’t meet that deadline, what’s new. However I do get an A for almost. By the first day of school the desk was attached to the wall and there were chairs.

Although I’m not totally sold on the wall color that the previous owners left, I needed to pick my battles and at the time we were in the process of painting Addison’s room and heaven knows the effort was more needed there so the color stays for now.

DIY Home Living Our Home School Summer

Summer Vacation Week 8

….sigh. Welp, I know I talked all that noise about being ready for the children to go back to school. While I’m still all #TeamBackToSchool, I just wish they could go back and the activities, homework, social calendars etc. would just hold off for a few more weeks.

We have exactly two weeks until the bell rings and I am running around here like crazy trying to get everything decluttered, painted and in some sort of order. My goal is to have the house done, or rather what I plan on having done completed by the end of this week so that next week I can chill.

This week we didn’t do much, we swam and shopped a little. The baby was in Florida so I think we all just chilled and enjoyed the silence. I went and got her on Friday and the turn up has been in full force ever since.

Speaking of shopping I came across some pretty awesome deals. I was in Michael’s going through their clearance and came across this baby.

The original price was $99. It was marked down by 70% to $30 and then I had an additional coupon for 25% off. I paid $23 for this yellow baby. Isn’t she pretty

Michaels


Found myself in Walmart picking up some stuff for the Homework Space and came across this. Was minding my business looking at school supplies when the lady came over the PA system and said, ” All items on our clearance rack starting at 1:30 are half off the red sticker price.” *Glances at my watch* Oh, it’s 1:45 let me go see what I can see.

Saw this. Paid half off $55. Now to find me a saw horse so I can really be a certified DIYer. Husband is concerned about my eyes and fingers. Told him I got this.

Skilsaw

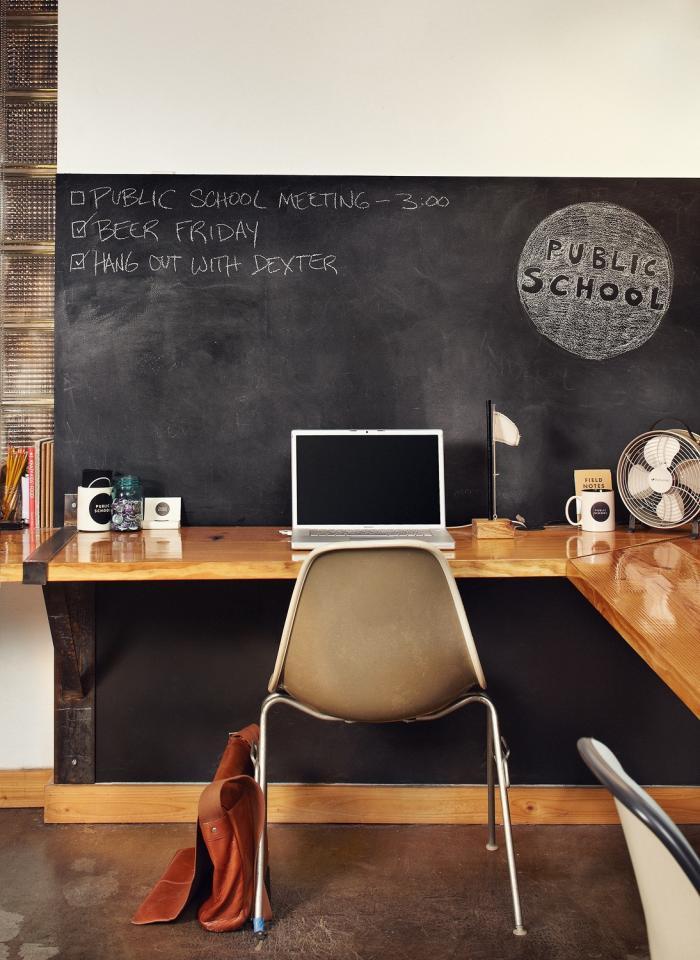
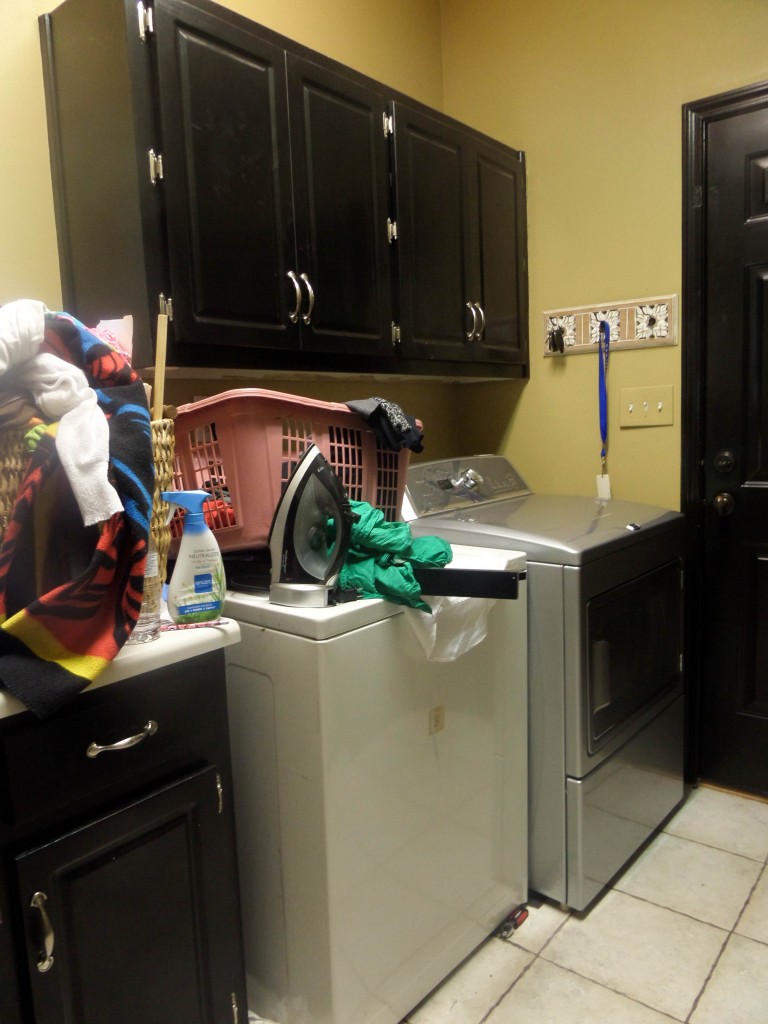
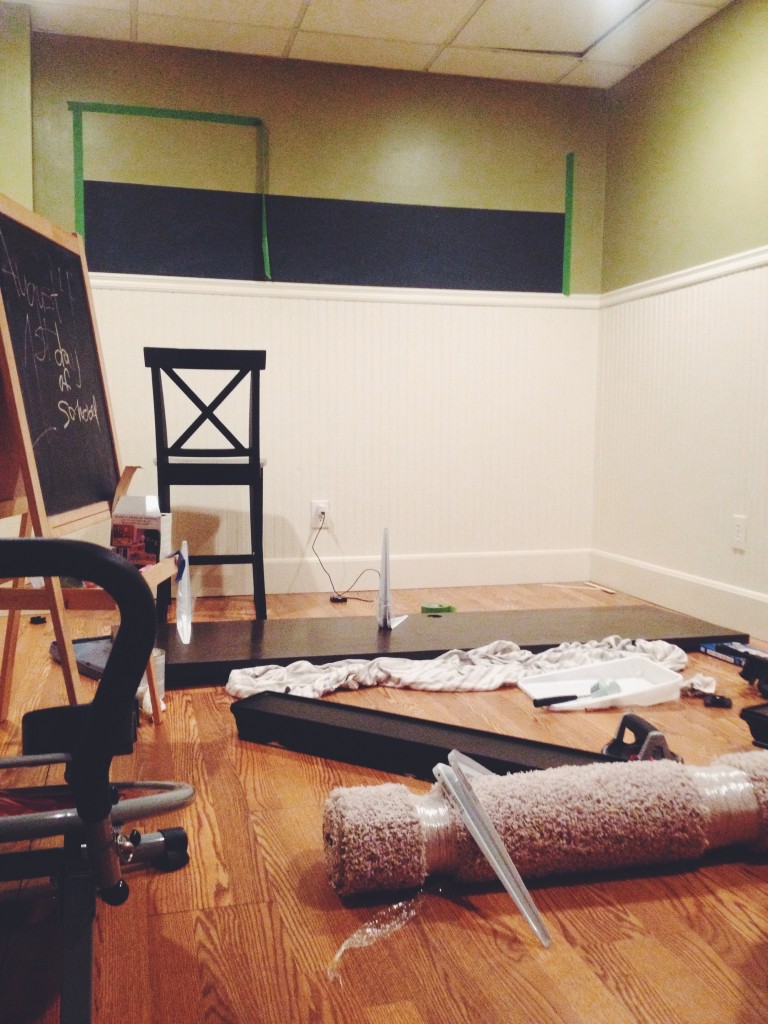
Amazing we’ve been here nearly a year and are finally getting a move on getting the house together. I’m just about done with the hard part of the Homework Space. Now I’m just going around the house trying to repurpose what I can. I’ve found some shelving, a bookcase and a few other knick knacks that will be reworked. The room currently looks like this. I extended the chalk paint above the line that is there. You’ll see the final reveal in a few weeks.

Processed with VSCOcam with f2 preset

I finally decided on a color to paint Addison’s room and the Mr. got to work. He can have that one, besides I ‘m trying to get the Homework Space ready. Here is the before. Just awful

IMG_4270

IMG_4272

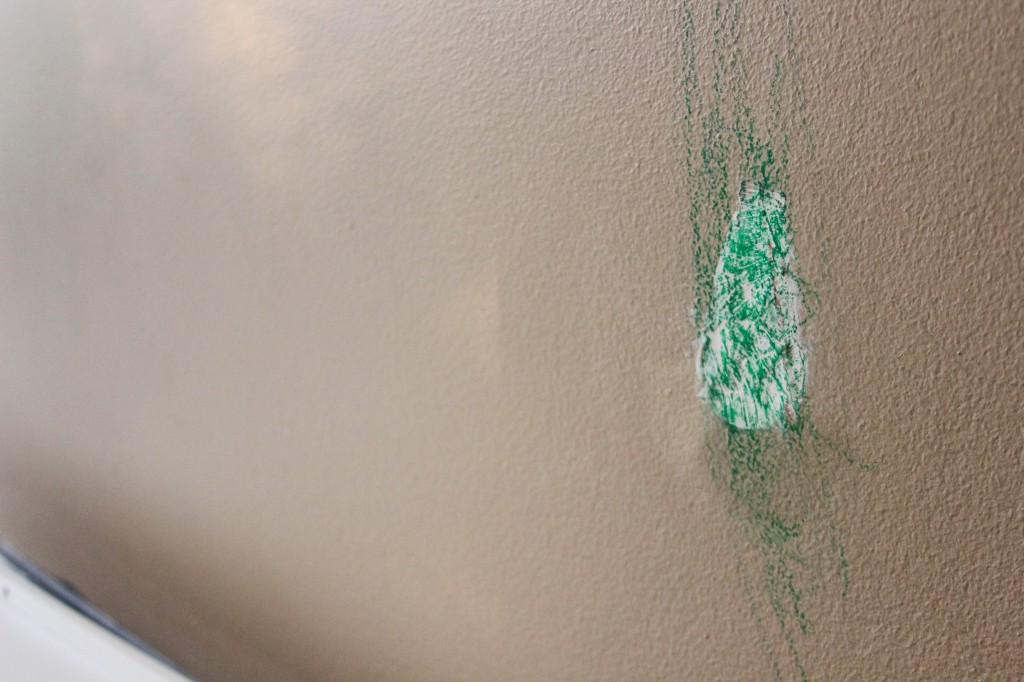
Disclaimer: This came with the house. My children know better than to write on any wall in here

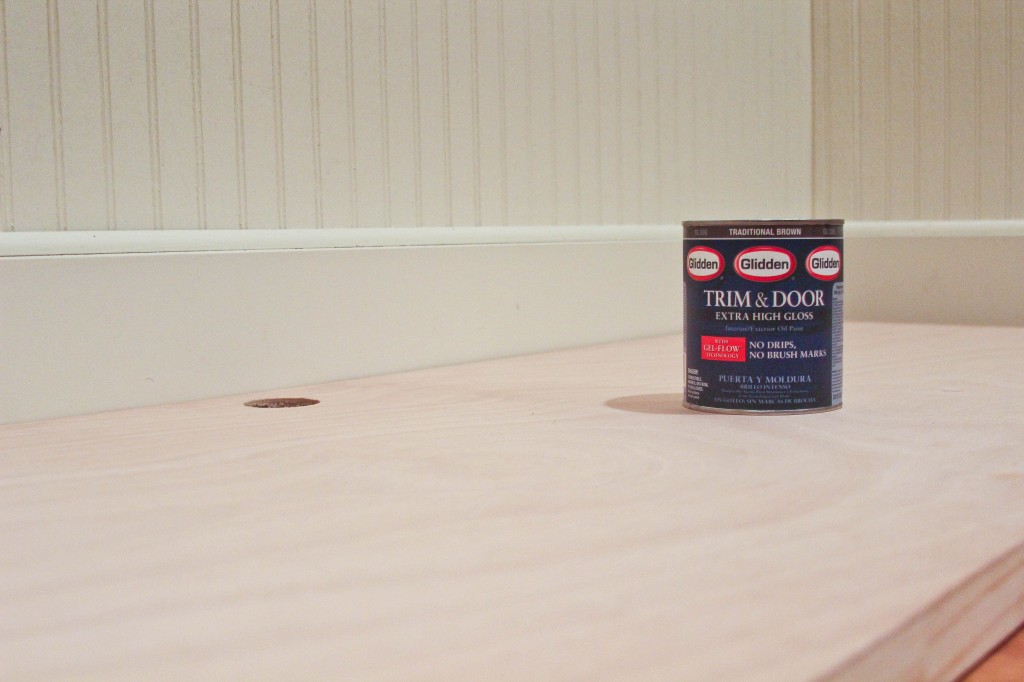
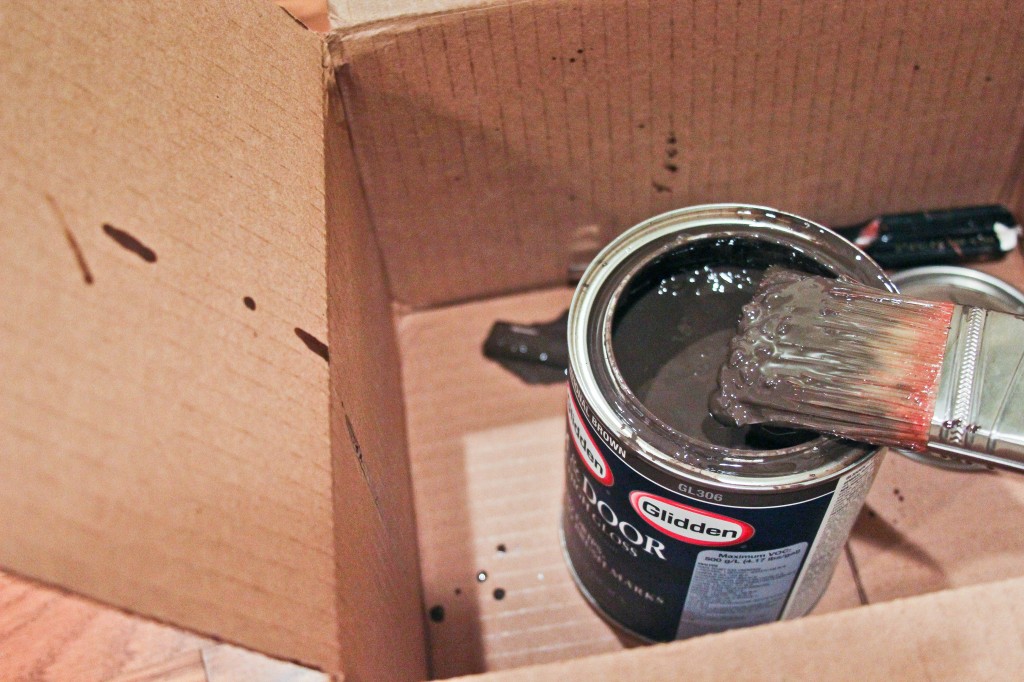
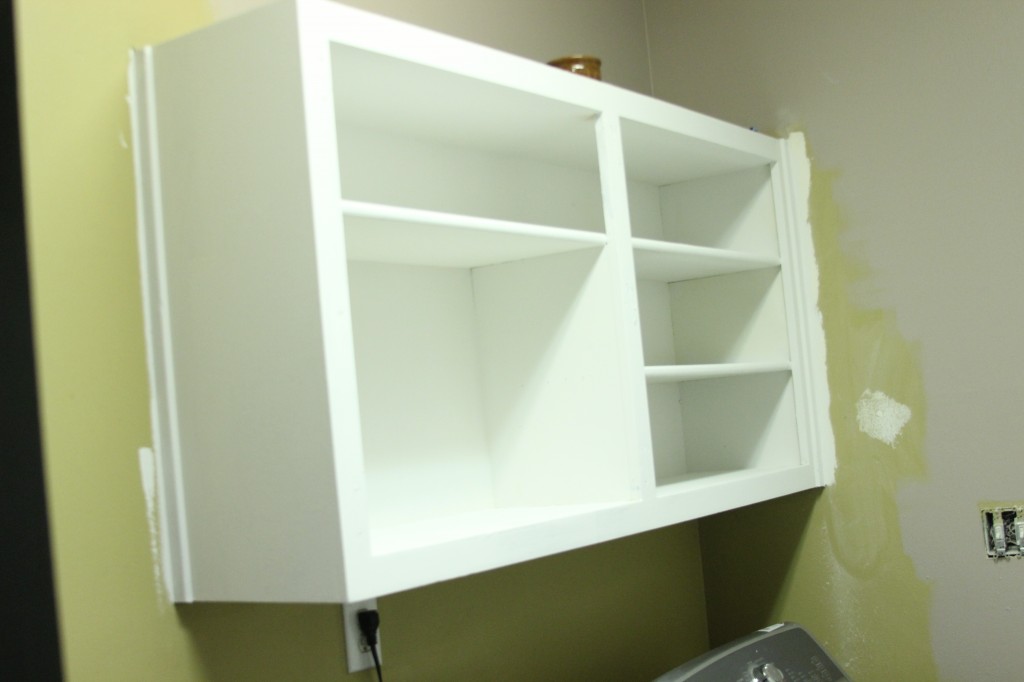
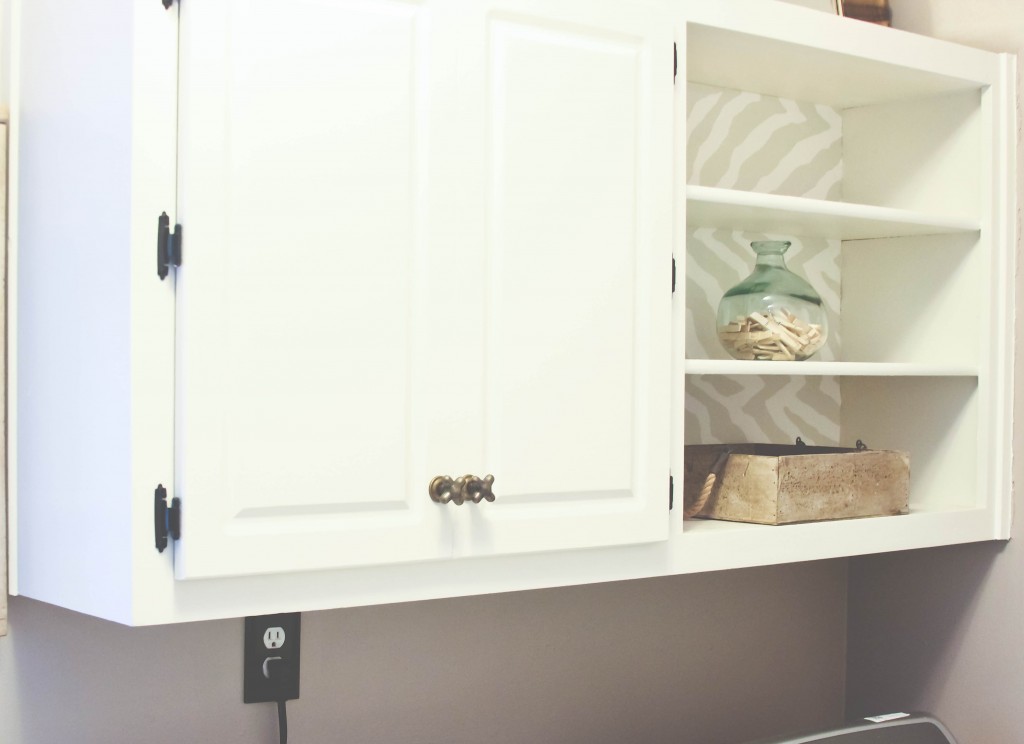
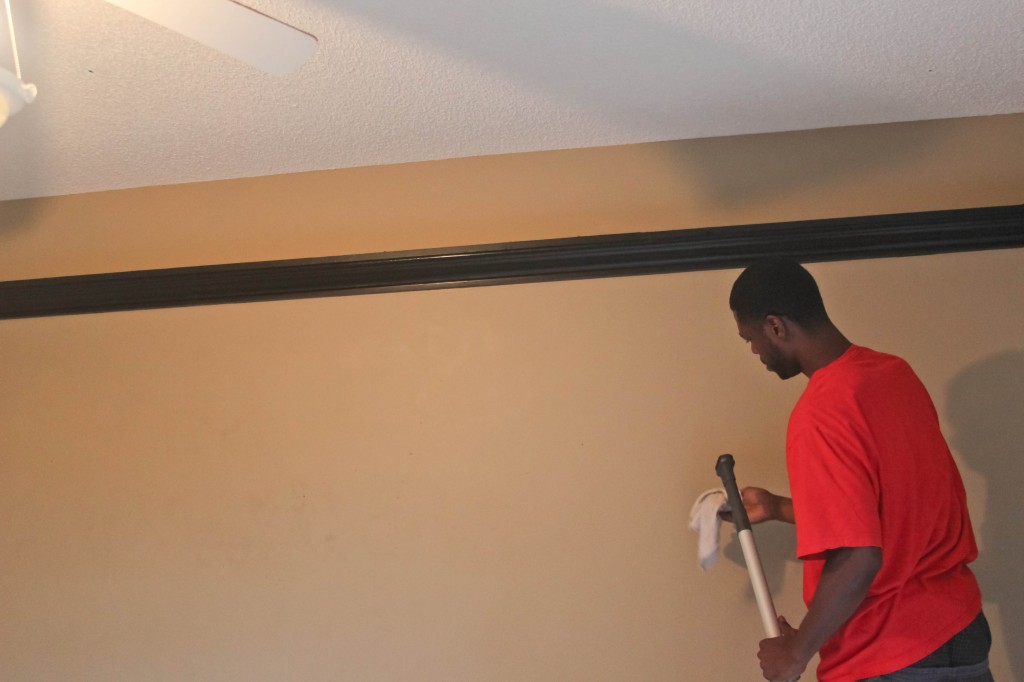
Mister got up there, bless his heart and thoroughly dusted and wiped down the ledge. I’ll reveal it later this week but as I type this the black is gone and it already looks glorious in there. A hint…the trim didn’t go white.

IMG_4269

Well that’s all I have. Nothing spectacular, but the normal. How was your week?

Floating Desk
Décor DIY Living Our Home Pinterest

{Homework Space Makeover} DIY Floating Desk Part I

I mentioned here that I was turning our workout room into a homework space/playroom for the children.

DIY Floating Desk

You should be so proud of me, the equipment has been sold and the room is now a blank slate. I spent more nights than I wanted laying under the covers with my phone and when it died, my tablet trying to come up with a solution for the desk situation. I needed two and paying $200 wasn’t an option so I was looking for a low cost alternative. The other day while in Home Depot we were looking for some options when I remembered a friend of mine mentioned we might consider a hollow door and that’s what we ended up going with after I consulted Pinterest from my phone and found similar examples.

Floating Desk

Source

The wall measures exactly 8ft. Unfortunately the door only measures around 7 ft so there will be gaps on the end and I’m fine with that. The door was a whopping $25 and I chose the one with the doorknob hole so that I have somewhere to fish cords through. We grabbed a few brackets, a quart of stain and a clear coat and headed home.

The perks of having an interior designer for a bestie is when you go to see your sweet precious god daughter for the first time her mother sends you home with free Glidden door and trim paint along with some chalkboard paint. I don’t need to tell you I returned the stain and clear coat.

Floating Desk DIY

So this isn’t your ordinary paint. It is gel based and is reported to give you great coverage with no brush marks and dry to a glossy top coat. It was a little lumpy but once I got it on the door it spread easily and covered like a dream. I didn’t have to use that much.

Glidden Trim and Door Paint

The next day it was rather tacky to the touch, however after sitting for the past 3 days it is no longer sticky and is ready to be put on the wall. The pictures don’t do the glossiness of it any justice. Super shiny I’ll be back with an update!!

DIY Floating Desk

DIY Home

{Laundry Room Makeover} Wallpaper Lined Cabinet

It’s hard to believe that on July 31, we will have been in this house for a year. For those who have been reading for awhile, if you can recall the whole process really consumed me and I am again thankful for blogging as it provides the opportunity to go back and see areas of struggle and triumph. Oversharing has its privileges.

If you are new here, and want to be nosey feel free to go back and see what all of the drama was about. Click here.

Prior to moving in I had all of these grand ideas of changes I would be making immediately. People kept telling me live in the house a year before making any changes. Give yourself a chance to feel the house out, they said.

I brushed them off, nonsense. Clearly they weren’t looking at this

Laundry Room Makeover

I had grand plans of coming in here and getting to work. Wouldn’t you know a whole year has passed and not a piece of bedroom furniture, nor a kitchen table have been purchased. My intentions were real good but the reality is the majority of my grand ideas are still hanging from “pins” on the virtual corkboard that is Pinterest.

Welp, looks like I in advertently took their advice and I’m glad I did, but it is time to get to work tackling some of the smaller projects….like finishing the laundry room.

When I started on the laundry room one of my favorite people handed down a bit of wallpaper that she had left over from when she had her dining room done. It wasn’t a lot but enough to line the back of of the cabinet shelves. At the time I hadn’t started refinishing the cabinets so I wasn’t sure if it would get used. After deciding to go with the wallpaper lined cabinet in place of returning two of the doors it only took me six months to get the paper up. I’m glad I decided to leave them off.

Here is another before during the painting process:

2014-01-03 13.44.30

Here is the after.

Wall paper lined cabinet

Wall paper lined cabinet

Wall paper lined cabinet

After carefully measuring the space, and that wasn’t easy I applied Mod Podge to the back of the wall paper and applied to the cabinet making sure to wipe out any bubbles. That took a little effort but after I did the first one I was on a roll.

I am pleased. I still have to do a little more decorating to do to the shelves. I’ll be back with an update when I’m done.

I recently read something on a décor blog that stated in summary, our homes are ever evolving and the beauty comes in completing small projects and over time seeing the spaces become those that we love. I concur.

What do you think?