Browsing Category

Home

how to freeze fresh basil
Feature Food Home

Never Throw Away Fresh Herbs Again

You know how it is, you have every intention to eat right, or try a new recipe so you buy fresh herbs, and then before you know it you’ve wasted your money. Nothing goes bad faster than fresh herbs. Ask me how I know.

This year I finally had some success growing basil in the garden, but I can’t eat it all at once so I’ve been freezing it for winter. I figured I can’t be the only one who has thrown away my fair share of herbs so here’s tip on how to preserve fresh basil… I’m certain this method will work with other herbs as well.

It’s quite simple, you want to start with washing and drying the herbs

Once dry, give them a rough chop.

Insert them into ice cube trays. I grabbed mine from Dollar Tree, they were 2 for $1. Once you have the slots full, cover the herbs with olive oil. You don’t have to fill to the top but make sure the herbs are fully covered.

how to freeze fresh basil

Now freeze for at least 24-hours. It can be a little difficult getting them out of the trays but whatever you do, don’t run hot water on the tray, the oil will melt immediately. Once you have popped out the cubes, put them in a freezer bag and store for future use.

how to freeze fresh basil

Y’all know I love making videos! Here’s a video of how I freeze my basil.

Home

Home DIY | Ways to Proactively Save Money Around Your House

Being a grown-up isn’t always fun but saving money is. Thank you to The Metropolitan North Georgia Water Planning District for sponsoring this post. All opinions are mine!

Whoever said growing up is a trap, hit the nail right on the head. Being a grown-up at times can be completely overrated. Completely.

This weekend my neighbor took me to brunch for my birthday (remind me to tell y’all about turning 40), and over mimosas, she talked about how the county came to inspect her property after thinking she may have had a water leak when they noticed more water than usual being used at her home. Turns out, she forgot to turn the timer off on their sprinkler and it had been running every 4 hours or so, every day for the past two weeks. Sprinkler systems are fabulous, and can even help reduce overwatering, but they need to be monitored!

We hollered laughing at how high her water bill is going to be and how mishaps like this seem to be the foolishness that adulthood and homeownership are made of. Between tears of laughter, cause in these cases you have to laugh to keep from crying, I shared how high our bill was when we attempted to use the irrigation system and later decided the old school method of moving that sprinkler we ran through as kids manually around the yard and watching as areas got well watered was good enough.

I think everyone is trying to save a few coins instead of giving them away and one way to do that is to be proactive about home maintenance. Whether you rent or own, you can take steps to make sure you are doing your part to protect the environment, your property, and your coins.

One of the easiest ways of doing this is by paying attention to your water usage. You know the usual, don’t run the water when brushing your teeth, or washing dishes. Shorten your shower by 2 minutes. Wash your clothes in cold water, or the least amount of water needed. There are so many minor tips we can use to conserve water, but one we may overlook is simply checking our faucets and under our sinks for water leaks.

March 1th – March 24th is the EPA’s Fix a Leak Week. This initiative is aimed at making the public aware that there are more than 1 trillion gallons of water lost every year from simple home leaks. 1 TRILLION.

TRILLION.

That’s a lot of water… and money lost.

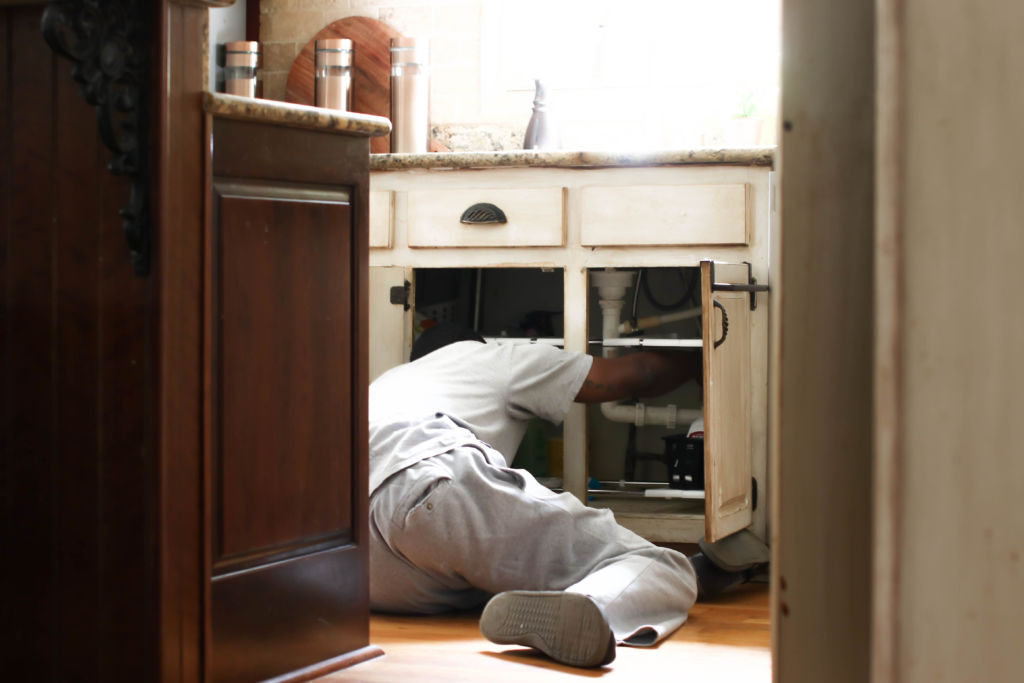
If you follow my Instagram stories, you know Adrian is all about keeping this house together. Whether you are an avid DIYer or a call in the pros type of person, spring is the perfect time of year for home maintenance. You can start by simply looking under your sink for leaks.

Things you’ll want to look for include: water drops along the pipe, a damp cabinet, or any sign or sound of dripping water.

According to the Metropolitan North Georgia Water Planning District this is how much water we can easily waste:

A faucet that leaks one drop of water per second is equivalent to 8 gallons per day

A running toilet can waste up to 200 gallons of water a day

Household leaks are the most expensive form of property damage (that can be prevented

Yes, all of these from a simple drip, drip, drip, out of the faucet. The Metro Water District is passionate about educating the public on how to conserve water and money. Their efforts have helped the region decrease  water usage by more than 10 percent despite having a million person increase in population!

Interested in learning about more ways you can conserve water and save money? Be sure to visit The Metro Water District online, as well as on Instagram, Facebook, and Twitter.


DIY Home Living

One Room Challenge Week 6 | Master Closet Reveal

We did it. In six weeks we transformed our small, non-existent closet from nothing to something. In the event you weren’t keeping up we signed up for the One Room Challenge.

If you have missed the last few weeks, let me catch you up. We participated in the one room challenge. Which is a  six week challenge where designers, and guest participants share the transformation of a room from concept to completion. It’s quite inspiring to see so many people transforming their homes during a six week period. You can follow along by going to the link above or scrolling #OneRoomChallenge on Instagram.

One Room Challenge

My last update post was on week 4. During this week we had to rip out the first cabinet that Adrian built and re-do it. For the details on why, click here.

I was a little apprehensive that he would get it completed, and there are still a few things that need to be done, like crown moulding, adding a mirror and a new door but the major things have been completed.

Here are a few photos of the transformation during week 5.

After this photo, the floor was grouted and I ended up adding some removable wall paper from Target into the nooks of the cabinet.

…and here is the final reveal

I can’t tell you how happy I am with the way this turned out. With the mishap and having to re-do the cabinet, this project still came in under $325 total. These photos do it little justice, it is a very tight space to photograph and there is no natural light so I did the best I could. We still have to put in a light, and finish the crown moulding, I’ll do an update in about a week once that is completed.

We’re hype and have now decided to attack the basement next weekend.  I think we’ve finally found our home improvement groove!

To see the before photos along with the progress of the closet during the past six weeks, here is the breakdown

Week 1 (before photos), Week 2, Week 3, Week 4.

I feel a lot of outfit of the day photos in my future! Here’s to hoping it stays clean and organized.


DIY Home

One Room Challenge Week 4 | Master Closet Makeover

Oh friends. Your eyes do not deceive you, this picture is slightly identical to last week’s but a little different. Have a seat, let me tell you what happened.

But first, if you have missed the last few weeks, let me catch you up. We are participating in the one room challenge. Which is a  six week challenge where designers, and guest participants share the transformation of a room from concept to completion. It’s quite inspiring to see so many people transforming their homes during this six week period. You can follow along by going to the link above or scrolling #OneRoomChallenge on Instagram.

One Room Challenge


You can catch up with Week 1, Week 2, and Week 3 at your leisure. Now back to “what had happened was.”

We discovered the width of the cabinet was a few inches short of a normal hanger. This meant that the clothing would hang out in the open and not be flush with the edge of the cabinet. I’m afraid this made no sense, in other words the shirt would hang past the edge of the cabinet.

We tried to come up with a solution to make it work, but the end result was ripping out the old cabinet to build a new one that was 18 inches wide to account for a hanger making everything look neat and flush. If you follow me on Instagram Stories you saw the whole saga go down. I’m too tired to create a video of my IG stories, hang tight, I’ll post it next week.

But anyway it looked a little something like this:


He was removing the trim at this point, I was low key in the corner weeping. Upside was that we were only in about $65 at this point. We are able to reuse the old sides as the top shelves so we really didn’t lose more than $15 that was spent on the MDF boards that he made the shelves out of.

If you look closely you can see the new one, on the left, is larger across allowing for more storage. More storage is always a good thing.


Might I say I’m glad we took this step back to make sure we would love the end product moving forward. He has me convinced that we will have the closet ready to reveal on November 7. I’m keeping hope alive.

Here’s our unchanged list of things that need to be done from last week:

Here’s what we need:

  • More hanging space
  • Better shoe storage
  • Shelving (built-ins, shoe shelving, high shelving for storage)
  • Grout existing flooring
  • New lighting
  • Paint (ceiling, walls, built-ins)
  • Drywall repair (ceiling, walls)
  • New hangers
  • Glass closet door
  • Baskets
  • Floor length mirror
  • Install hanging rods
  • Rug